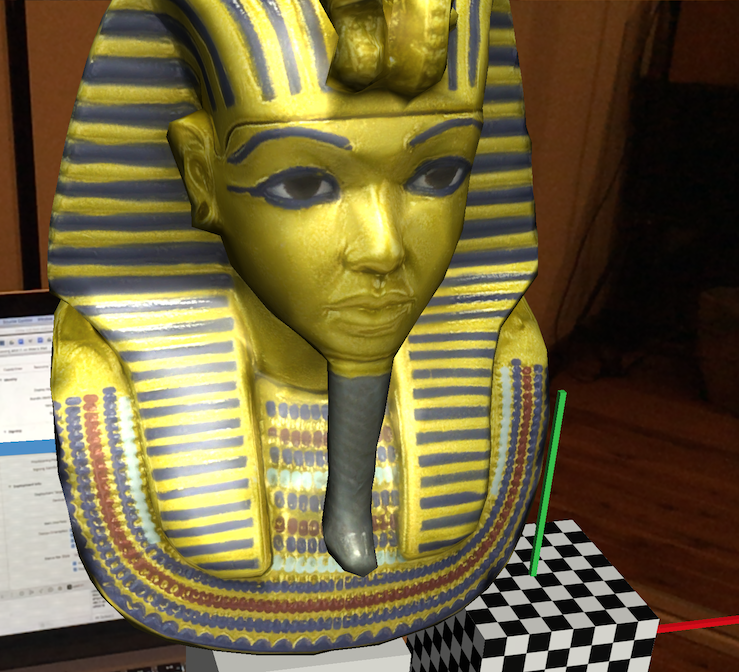
ARKit is just wow:
Check out many more examples here on twitter: @madewithARKit
Quick History of Mobile AR
Whilst mobile Augmented Reality solutions have been around now for years, mostly thanks to OpenCV (and one of its the hugely popular derivates the commercial Vuforia), they have failed to make Augmented Reality truley accessible to a wider consumer audience, and mostly I think the reason is the reliance on using image markers to trigger and track the Augmented Reality content. This meant the consumer needed to locate the image to reveal the AR experience and then generally keep the image in view enough to keep the tracking system working (Vuforia does support looking away from the trigger image, but it mostly relied on the orientation sensors on the device so it would not maintain stable tracking once the image was not in view).
One ideal solution was to use SLAM tracking of the environment to create world tracking without needing an image marker. One of the first practical systems for this was the PointCloud SDK from 13th Lab back in 2013 – but once they were acquired by Oculus that amazing technology disappeared.
Metaio had a wide range of AR features, including a basic SLAM tracking system. Metaio was aquired by Apple in 2015 and there has been speculation ever since about what Apple was going to do with the Metaio technology.
Well as you are reading this tutorial, clearly you are aware that after sitting on the sidelines for a number of years Apple have finally entered the AR space, and WOW, they have really made an impressive entrance.
In particular what I like about Apple is that they created a very workable version of SLAM and made it easy to develop for. They have far exceeded the capabilities of other SLAM libraries.
The ARKit they released provides for markerless world-based tracking with real-world scale. And it not only supports Apple languages ObjectiveC and Swift, but the popular gaming engines Unity and Unreal! Wow!
What is ARKit ?
Essentially, when you turn on an ARKit app it will It use visual (camera) and motion data (sensor) to get relative tracking in the real world. Once it starts to track the phones initial position is registered and as you move and look around it determines your phones new position and orientation in space relative to that original tracking point.
Unlike previous popular AR SDKs ARKit needs no additional calibration or extra setup or hardware.
In your application you can create anchor points at any position and orientation in the world space tracked by ARKit and then add 3d content into the scene.
Using Unity3d you can use all its standard features, such as animations, physics, etc.
What devices can run ARKit?
You need a fairly recent Apple mobile device and it has to be running iOS 11 (A9 chipset above).
Other platforms (notably Android) are not supported.
How does ARKit work?
The best technical overview is to watch the WWDC video “Introducing ARKit” below:
Apple have done a great job to keep ARKit as simple as possible.
The core pieces you need to know are:
ARSession
The session means you are running in AR mode, and everything you want to do you can configure on the session or query the session to get details about the AR world. So basically you need an AR session to do anything.
The session will perform real world tracking automatically and represent the world in meters.
Note: All positions are relative to the starting location of your iOS device in space when session starts.
ARSession Configuration
This lets you define what features in the current ARKit framework you want to use in your AR experience.
For instance, you can decide if you want full world tracking or just 3 degrees of freedom gyro tracking. You can enable if you want plane detection (horizontal or vertical).
ARFrame
With a session you can query it to obtain an ARFrame. The frame has the camera image (to display on the screen) and tracking information (the position and orientation of the users iOS camera).
You can also get information from the scene, such as feature points and light estimation.
ARAnchor
This is an auto-detected real-world position of points and planes in the space around you.
They represent virtual content anchored to the physical environment.
You can get events when they are added, updated or removed.
Unity3d
And that’s it, with the Unity3d plugin you get a bunch of components to do all the above automatically, and such useful code samples as mapping a touch on the screen to a touch point in real-world space around you.
Lets’s build the ARKit Unity3d Sample
Setup your iPhone or iPad
First you need an Apple IOS device running IOS 11.
To install the latest iOS 11 Beta, log into your Apple developer account, and go to download and download the iOS_11_beta_Profile.mobileconfig file. The webpage looked like this for me:

You need to install this on your iPhone or iPad – I simply emailed that to myself, opened the email and tapped on the attachment to install it.
Tap on it in your email and you will see this:
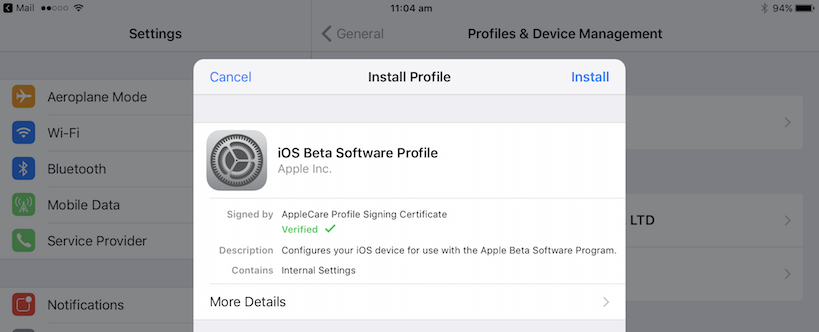
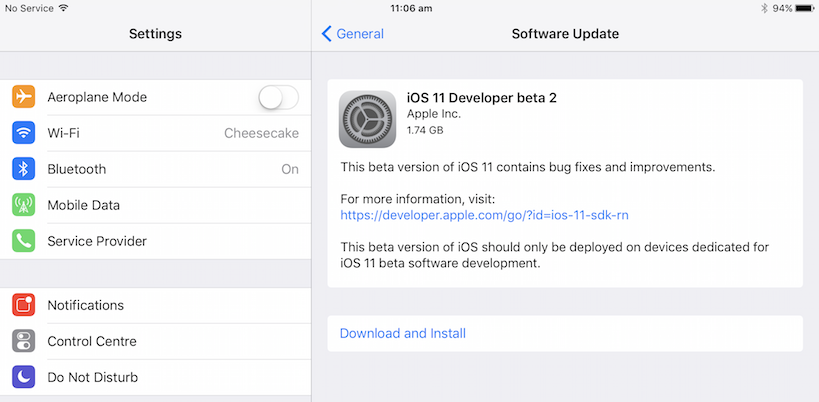
Once installed, you can go to Settings -> General and there will be an upgrade option to install IOS 11 Beta:
Setup the developer tools
We’re going to use Unity3d to build for ARKit here, but it requires some dependencies, specifically you need XCode 9, which means you need to be on a Mac (no surprises there!).
XCode 9
To install XCode 9, you need to be on MacOS Sierra (10.12 and higher). To update your Mac, go to Apple menu -> “About this Mac” and use the “Software Upgrade…” option.
Then to get XCode 9, log into your Apple developer account, and again go to download and download the XCode 9 installer:

Note: If you want to run XCode 9 side-by-side with XCode 8, that is fine. Currently XCode 9 install as an app named “Xcode-beta” so it doesn’t conflict. It may be out of beta by the time you are reading this, so in that case rename your previous Xcode, say to Xcode8.
Once downloaded, double click to install XCode 9.
Launch it, that seems to make it the default one for Unity to use. (eg: Unity will use which ever one is currently opened).
Unity3d
You need to download a recent version of Unity3d, I believe the earliest support for Xcode 9 is in Unity3d 5.6.1p1 – I am running Unity3d 5.6.1p4, download it from:
https://unity3d.com/unity/qa/patch-releases/5.6.1p4
ARKit Unity Plugin
Now to actually use ARKit from Unity we need the plugin that Apple has released.
It is not currently available on the Unity asset store, instead you can download a single pre-packaged Unity Package from:
https://oc.unity3d.com/index.php/s/3hfM9T05P9vOpCf
Or, download the code directly from a BitBucket repository that Unity has created:
https://bitbucket.org/Unity-Technologies/unity-arkit-plugin
Build the example project
So, first create a new Unity3d 5.6.1p4 project in 3d mode.
In build settings switch your platform to IOS, and then go to player settings and set your bundle id, eg: com.me.arkittest
NOTE: Super important is you need to add some text for “Camera Usage Description”, I just set mine to: “Used for Augmented Reality”. If you don’t do this, your app will crash when trying to open the camera.
Double click on the Unity-arkit-plugin.unitypackage to install it into your current project.
Open the scene in the root folder named “UnityARKitScene”.
Note: You can press run in the editor, but it can’t access the camera so it won’t let you experience AR inside the editor. For that you need to test on a real device. Hopefully they will add in-editor testing at some point.
Now open build settings again and add this scene to your build. Then press Build.
Now, to make sure you use the correct Xcode, just pre-open Xcode 9. Then double click on the Xcode project file that Unity just created in the folder you selected.
Plugin your iOS 11 device, and in Xcode 9 select it as the current device. Then press the RUN button.
Once installed on your device, it should boot to the camera screen (asking permission first) and then as you look around you will see 2 debug assistance content:
1. the dots representing what point of detail it is detecting and tracking in the environment
2. the blue rectangles representing horizontal planes it has found in the space around you.
Tap on any part of the blue planes and you will see a small 10cm cube appear. Then you can walk around and view it from all angles.
Well done – you have everything setup correctly to use ARKit !
Add your own content
Here is a 50% scaled version of the Saturn V rocket that I found hanging about at my local mall:
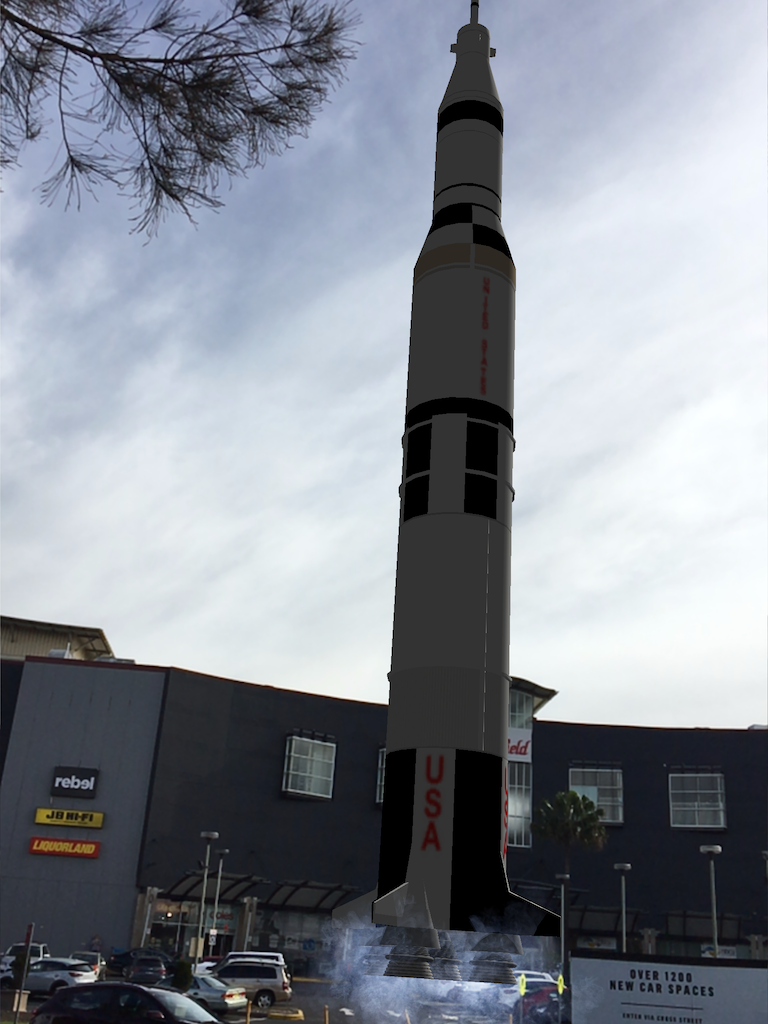
An easy way to get started to add your own content, is to use the demo scene we just built.
Firstly, download some content – the Asset Store window is a great place to find content.
Download a 3d asset (such as the rocket above) and install it into your project folders.
Next there should be a prefab created for your particular model, so you want to drag it into your scene and make it a child of the HitCube:

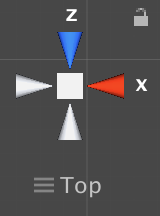
When you tap on the screen to place the HitCube, be aware that the orientation of your prefab will be be aligned with the world space axis. So if you look at a top view, the object will face towards the -Z direction. Press the axis top view so you can see where the back and front of your object is:
This can be a bit painful because that depends on where you’re iOS device is facing when you launch the app.
So one handy thing to do is to force your object to rotate so it faces the iOS device camera when you move it with a tap.
Automatically Face the Camera
Edit the UnityARHitTestExample.cs script to add this:
On line 18, after the position and rotation has been set with:
m_HitTransform.position = UnityARMatrixOps.GetPosition (hitResult.worldTransform);
m_HitTransform.rotation = UnityARMatrixOps.GetRotation (hitResult.worldTransform);
Insert this code:
// Face the camera (assume it's level and rotate around y-axis only)
m_HitTransform.LookAt (Camera.main.transform.position);
m_HitTransform.eulerAngles = new Vector3 (0, m_HitTransform.eulerAngles.y, 0);
Now when you tap to move the object, it will always face you.
Turn off the debugging dots and planes
If you want to hide the point cloud dots, simply disable the PointCloudExample game object (which has the component script UnityPointCloudExample.cs attached
To hide the blue bordered rectangular planes, simply disable the GeneratePlanes game object (which has the UnityARGeneratePlane.cs component script which adds in the prefab for the planes UI)
Avoid the content hanging in the air
The example scene will move your HitCube content to any ARAnchor it thinks your finger tap has hit in the tracked world, which includes both the plane surfaces and random anchors it places in the air. To always make your content be placed on a detected plane and never in the air, you simply modify the UnityARHitTestExample.cs script to say you only want to detect taps on planes.
In the Update() function, comment out every type except for ARHitTestResultTypeExistingPlaneUsingExtent:
// prioritize reults types
ARHitTestResultType[] resultTypes = {
    ARHitTestResultType.ARHitTestResultTypeExistingPlaneUsingExtent,
    // if you want to use infinite planes use this:
    //ARHitTestResultType.ARHitTestResultTypeExistingPlane,
    //ARHitTestResultType.ARHitTestResultTypeHorizontalPlane,
    //ARHitTestResultType.ARHitTestResultTypeFeaturePoint
};
Leave a Reply