
So some exciting news is that I am a Top 10 finalist in the Hololens Contest jointly sponsored by Microsoft and Unity3d! The finalists were announced on 12th July 2017, and we have until 30th October 2017 to submit a Hololens application.
The goal of the contest is to create a world changing idea for HoloLens, that importantly can help solve a real-world problem today.
My entry is Holo Butterflies – which is based on a VR experience I developed on HTC Vive and for school kids to use. That experience was cross-reality where kids could draw or design butterflies in the traditional way (eg: draw on paper), then scan it into Virtual Reality where it can come to life and fly around you. There was some gasification where you can release all different butterflies and catch them with a butterfly net. Kids liked it because they saw their physical art come to life in the digital world.
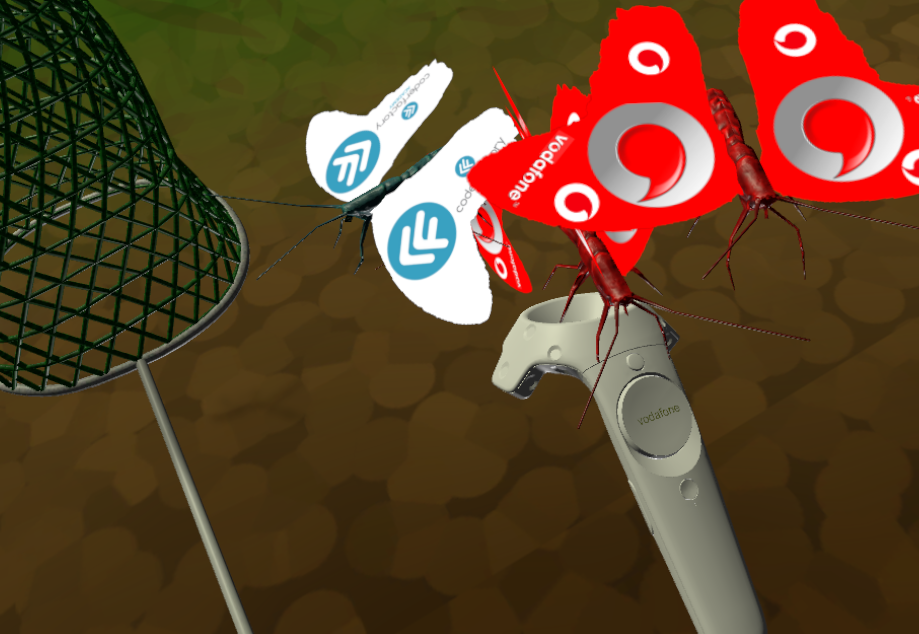
The key part about it is not really the butterflies (although they are quite beautiful) but how the application integrates into the existing process in the classroom. VR and AR headsets are expensive and complex, and at this time you won’t find a classroom with headsets for all students, so rather I wanted to find a way to integrate one or a limited set of VR and AR hardware into the class curriculum.
The judges clearly liked the idea and progress, and so now I will be porting something like this over to the Hololens, as Holo Butteflies…
Official Holo Butterflies entry
Experience your space filled with beautiful and delightful virtual butterflies that you and your friends have designed in the real-world using traditional art.
Simply draw, scan, then experience them come to life around you – one or a hundred – as many as you like. Watch them, interact with them, or even catch them with your virtual net – but be gentle.
Holo Butterflies is a fun interactive experience for people of all ages.
The Judging Criteria
According to the T&Cs the winners will be judged according to:
- Technical Excellence: 40%
- Originality: 30%
- Experience (how it solves real world problems): 30%
The Competition
See the full list of the 10 finalists – and that is who I am up against!
Follow My Progress (Shhh)
Now, don’t tell the other contestants, but I’m going to share my progress here over the weeks to the end of the contest. About 12 weeks away.
I have been lucky that I get to do a lot of projects in AR and VR (and everything else too – cloud, mobile, IoT), and in most of those I am focused on solving a particular problem in a way that gets the most value to the customer and their users – and often that means coming up with unique and creative solutions (and long hours) to deliver something that has not been done before.
To do this, if I think about it, I generally follow a pattern of understanding the problem and some solutions, then bring a deep understanding of different technologies into it and come up with a couple of paths to try, try them, and usually there is a clear winner.
So, I will be using that approach here too.
This is the exciting beginning of the project – nothing has been built. Yes, ok, I have the original VR Butterflies app – but that alone doesn’t translate to Hololens. So right now I basically have nothing. That’s a bit scarey, but also thats why it’s exciting – because nothing is set, I have no idea what the final app will be like, but I know it’ll be great (somehow) and the journey will be amazing exploring Holo technology.
There is a lot of inspiration to draw on right now with VR, ARKit, Meta, Magic Leap, etc.
I hope I can innovate on the best that will work with Hololens.
This story will hopefully make interesting reading as the weeks progress and then see what the final result is in the judging.
The Plan (Shhh Shhh Shhh)
Let me share with you the plan I am going to follow to win this contest (OK, well come somewhere in the top 10. LOL). Again, please keep this to yourself.

To re-iterate, at this point I have no idea what I’m building or what the final application will look like, so we have a lot of uncertainty. So the Y-axis above represents the level of uncertainty – the closer we can draw together to the center then the more certainty we have. The X-axis is the time remaining until the end of the contest, and each week I am expanding or reducing the level of uncertainty.
For example, look at the this week, “Learn enough to get a Hello World built”. There is a reasonable level of uncertainty because I’ve never built a Hololens application before, but it’s not a major level because I do know you can use Unity3d, and I do a lot of Unity3d. But I don’t know the exact version that works best, or what other tools are needed, or how to setup and debug the Hololens. So the goal of this week is to be confident I can build a basic app, and see it working in the Hololens. Baby steps. But at the end of this week I have certainty about building for Hololens.
By following this plan I believe I can hit the judges criteria for technical excellence, originality and the experience.
Hello Hololens!
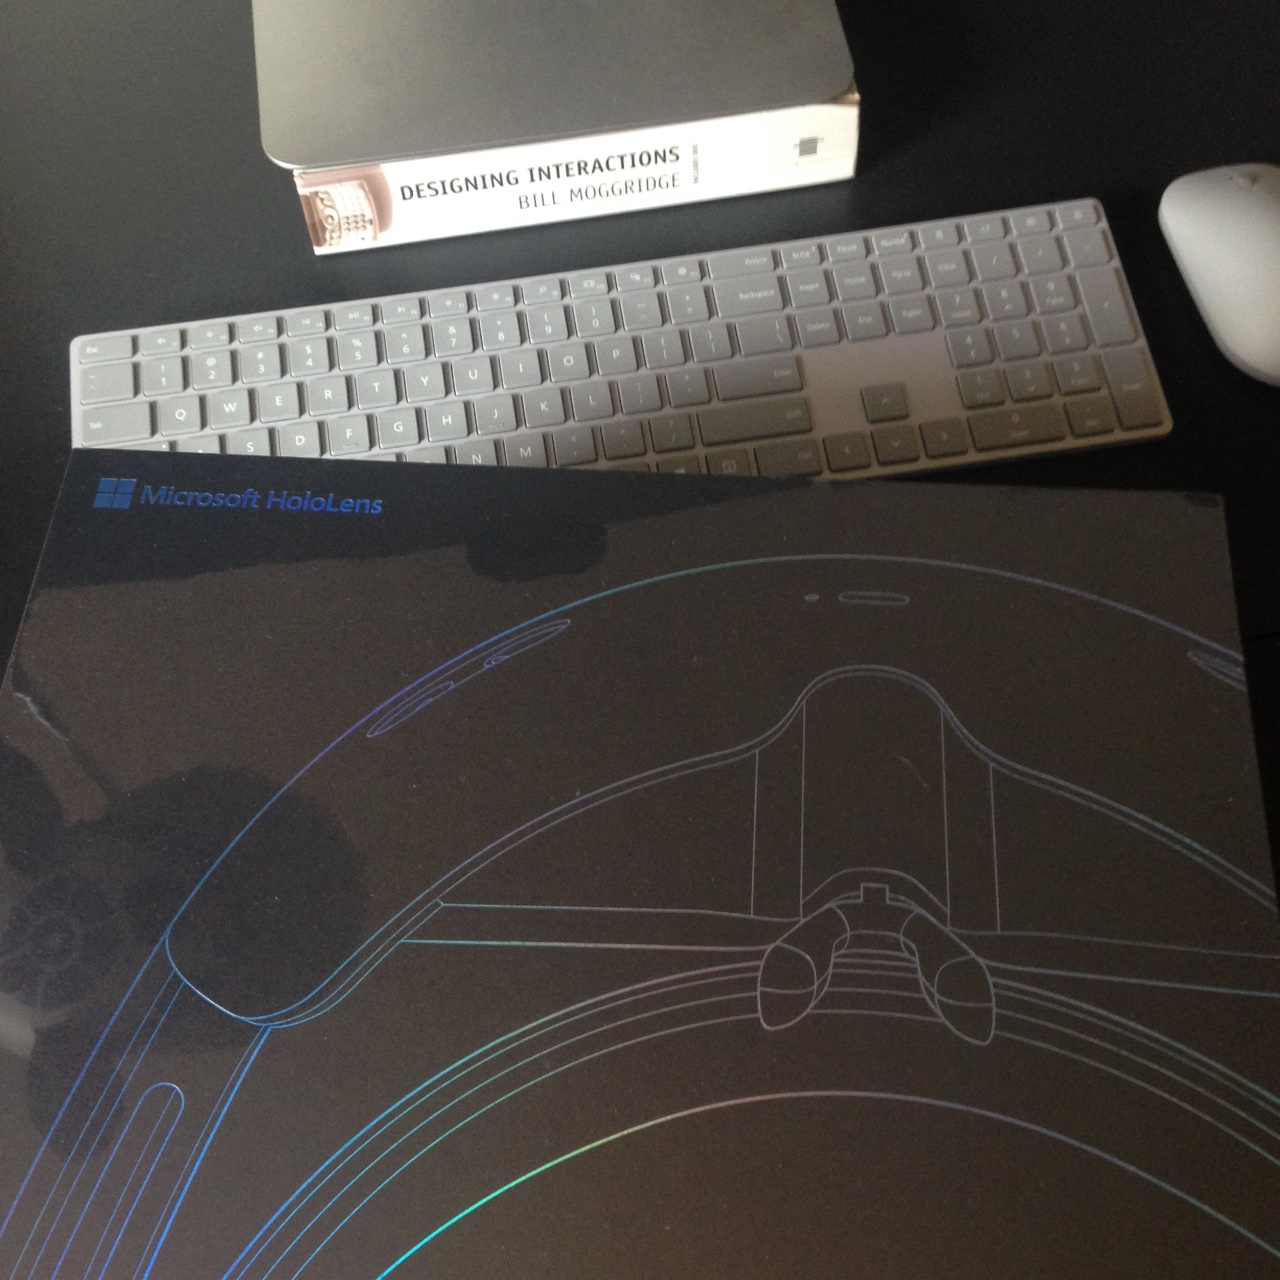
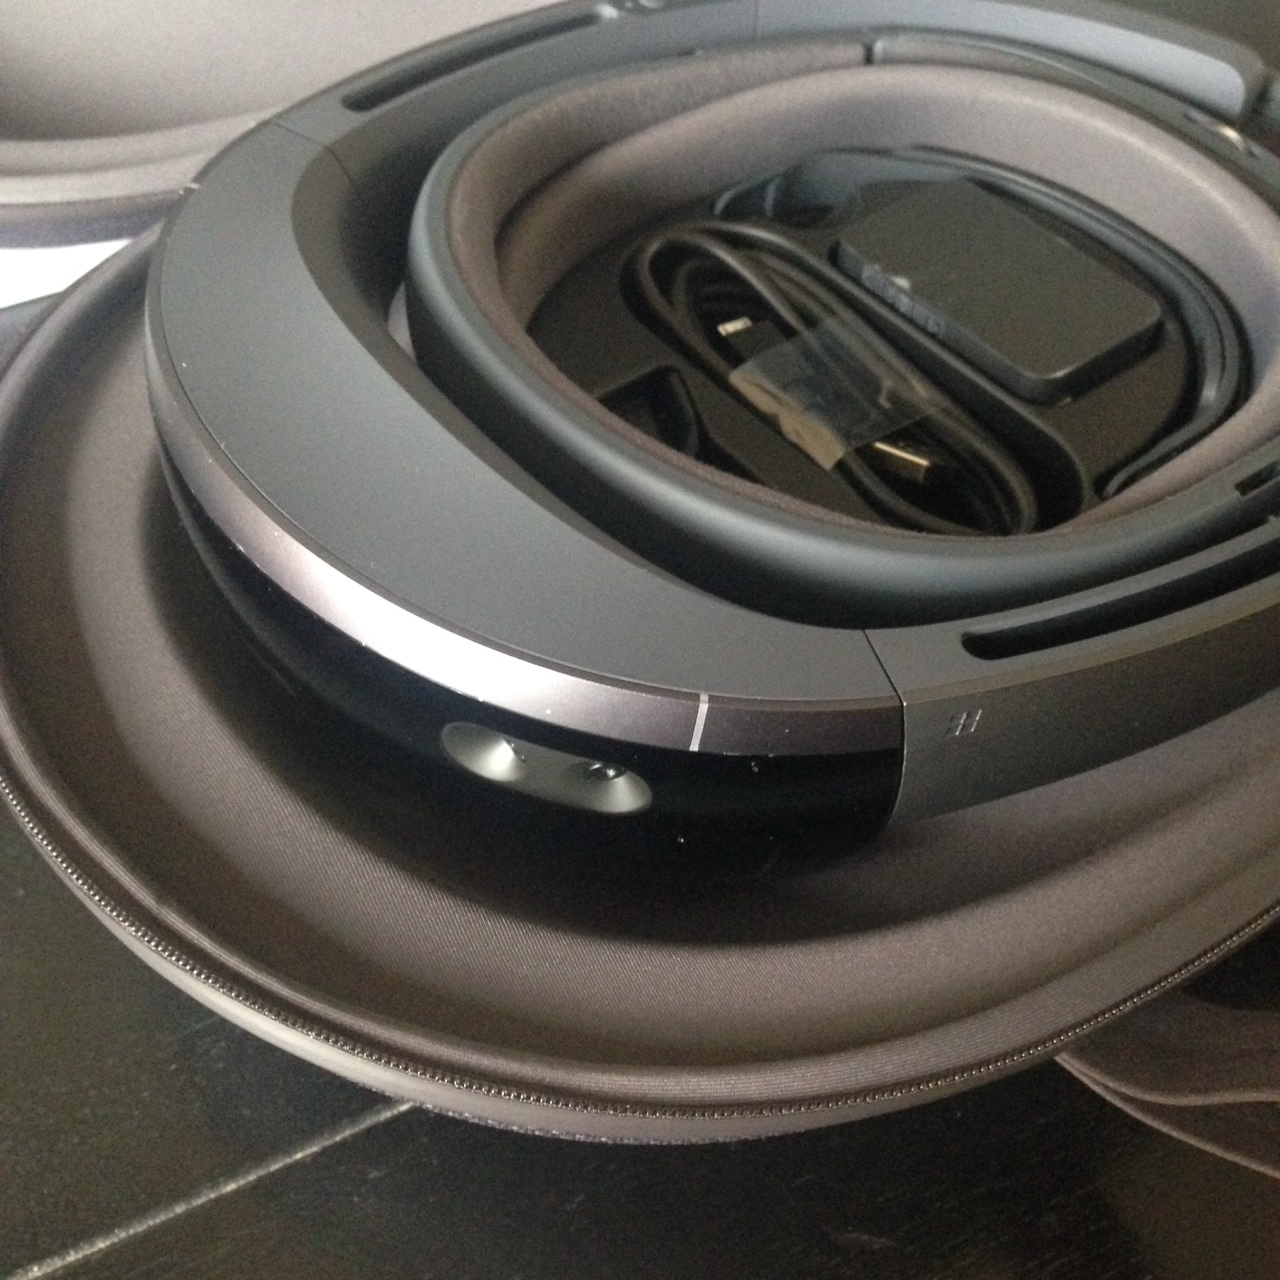
All top 10 finalists receive a Hololens developer kit on loan for the period of the contest. And here’s mine! It’s arrived. Very exciting.
My first impression is the packaging and headset itself are very click. Clearly a lot of work has gone into product development – to a very high quality level. Even the case for transporting the Hololens is well designed. I can slip it into my backpack and no-one is any the wiser I have a powerful holographic headset with me.
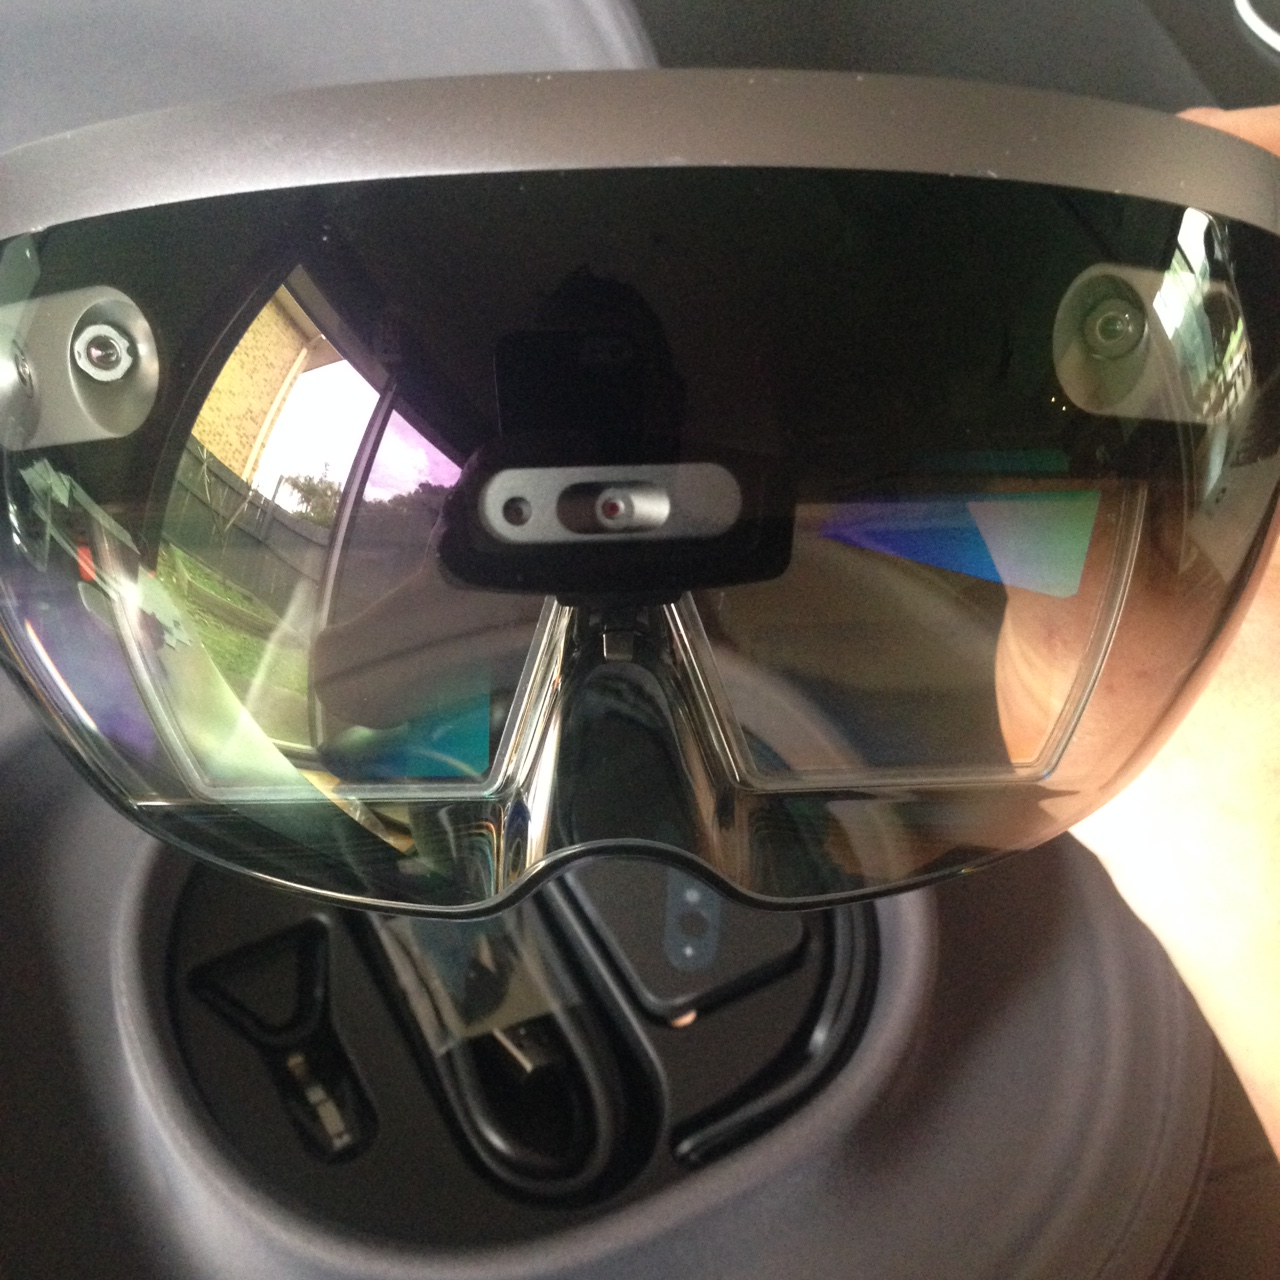
The first thing to do is follow the instruction booklet (yes, I actually thought it would be necessary in this case) and it shows you how to turn it on, and how to put in on your head. Once I had it on comfortably, and pleased to see it is designed to accomodate people wearing glasses, it then led me through the setup process of how the gaze pointer works and how to make selections.
Hololens User Experience
Interesting and most surprisingly Microsoft has not strayed far from the Windows desktop user-experience paradigm with the Hololens – even though it is a completely new type of product. On the desktop you have a mouse cursor and you left click to action the UI, with Hololens you have a gaze cursor (just like the mouse pointer) that is always in front of you and you move it around by moving your head around. I guess an actual mouse pointer image would look fairly ugly, so instead the gaze cursor is a small dot. When the gaze cursor is over an intractable element you can left mouse click – the way you do that in Hololens is using making a squeeze gesture with your thumb and adjacent finger. For that to work the camera sensors must be confidently tracking your fingers – so to give you feedback that it is, the gaze dot become a donut (circle) when your fingers are trackable.
An operating system’s primary user interface is called the shell, and here again the Hololens shell borrows key elements from the desktop. There is the start menu where you see the familiar app tiles and you can pin more tiles from your full apps list to the start menu. You also launch apps. The world around you is basically the equivalent of a desktop, and you can pin tiles anywhere around your physical space and the Hololens will remember where it was next time you use it. Those tiles are the fairly similiar to the icons on your Windows desktop, with one small but important change is that instead of showing an icon, the pinned app tiles show an image – which maybe the apps splash screen, or maybe a screenshot from the last time the app was run. The idea being it’s not interactable in the shell, it’s just an image, but you can click on the tile to relaunch the app.
There are actually two types of pinned app tiles, firstly the flat 2D image I just mentioned, and secondly 3D model as well. Only Microsoft can currently create 3D pinned apps (although some don’t actually launch an app – they are there for decoration only). A cornerstone feature on the Hololens is the built-in Holograms app that lets you place different holograms into your space (from a catalogue of about 60). They are either static models, or animated. Animated models can be played by clicking on them.
Another feature in the shell is the ability to take photos and videos of mixed reality ,so you can record what you are seeing. You can trigger either from the start menu, from pressing both volume keys down, or by using speech recognition: “Hey Cortana, take a photo”. The photos and videos you take are uploaded to your One Drive photos folder – very useful !
One last thing to note, is when you click on a tile to launch the application the shell is hidden, so only whatever content the app creates is visible. You can exit your application using the “bloom” gesture and you return to the shell. If the start menu isn’t in front of you, then “bloom” again to make it appear.
First Impressions
I’ve run the setup process, played with the Holograms app, and played with a few apps from the store.
My first impressions about the Hololens from a technical perspective are:
Pros:
– The hardware quality is like a generation 3 product. Even better then the XBox level of hardware quality. Very impressive to hold and wear. (10/10)
– World scale tracking is very very good. Better then I expected. It does drop out here and there, but the most part the content is where it should be so it is very accurate in maintaining correct tracking. (9/10)
– Room recognition is also very good. In the shell it doesn’t take long to remember which room I am in (I winder if apps get this feature?) (7/10)
– Oculusion is pretty decent, again better then I expected. If I put a virtual dog in a doorway then move around so part of the wall occuludes is then Hololens is doing a fairly decent job to make it look like the wall is occluding the dog. (6/10)
– Holograms themselves are bright and do feel like holograms (with the way the colour shifts as I move due to the optics). There is no black (which is see through), but as all colours are see through I was expecting it to be much more “ghostly” looking, but in fact in a normal lit room, the holograms are quite solid (7/10).
– Audio is excellent without needing headphones (9/10)
– Cortana works for speech recognition. I find myself repeating a few times with my Australian accent – but it does seem good. (7/10).
Cons:
– Field of view. Immeadiately obvious that it is far too small to be immersed. Constantly the content is being clipped. I estimate the FOV to be a 55″ TV at about 5 feet away. It sounds huge, but when your real FOV is > 180 degrees it ends up being very small. There is no official specification for the FOV, but media stories estimate it to be 30×17 degrees (which seems about right). Of course I’m sure many great minds are working on this problem, and just like the breakthrough with the Oculus Rift pre-distortion managed to push VR FOV to 100+ degrees – we’ll see something improve here. But right now this is a very obvious limitation to work around.
– Gesture tracking is also not rock solid. The bloom effect is pretty reliable. But I find the finger tap gesture is tricky. And my hand gets tired if I have an app that needs me to interact because you have to keep your hand within the depth sensor 120 degree tracking space plus your hand needs to be held in a way that the camera can see your fingers reliably.
– Gaze tracking is also cumbersome. In many scenarios trying to keep the gaze cursor over a button while you click it is frustrating. Full credit to Microsoft to create a generic new platform and have a base line gaze I/O experience that applies to all different experiences – but it’s just tiring and frustrating at times. This is another area to work around. I’m sure in the future we’ll have eye tracking and it will dramatically improve interaction.
– On board camera and microphone seem very good. I’ve recorded a few mixed reality videos today and they are clear and capture a good 60 degree or so field of view.
Well thats just first impresssions, I’ll get in depth into the hardware and technical capabilities next week as I explore what we can and cannot do, and what works well for a user experience within these limitations.
Hollo World!
After a bit of a play with the Hololens, mostly with the awesome (but basic) Hologram app, and a few apps from the Store, I really want to get something of my own built and working.
There are plenty of resources on the Microsoft Developer Mixed Reality page to get started and excited about what it can do.
But I don’t want to get caught and distracted by all the capabilities of Hololens yet, what I want to do right now is just prove I can build something and see it run on the Hololens. I want whatever is the most basic thing to do. Right now it is something like some 3d in my space.
So in the tradition of writing your first program on a new platform is is time to do a Hello World! ap, or a.. Hollo World! app (sorry, I couldn’t resist).
The full code to this app is available on GitHub: https://github.com/talesfromtherift/holloworld.
Firstly you need the following tools that I am using:
- Unity3d 2017.1
(make sure to choose the Windows Universal Platform during install) - Windows 10 SDK
- Visual Studio Community 2017
(Upon first run it will download some additional SDKs)
Now this may run on Mac, but I haven’t tried. I’ve decided to jump over to my Windows 10 laptop and build from there.
After installing lets create a new Unity3d project and switch the platform to Windows Universal (File -> Build Settings). Add the open scene which will let you name it and save it automatically with a camera and light.
Open up Player Settings, and enable Virtual Reality mode (make sure Unity has Windows Holographic set as the default VR platform (I deleted any other ones). In newer versions of Unity this is called Windows Mixed Reality. If you don’t turn on Virtual Reality then your app will run in a flat 2d windows pinned in your space, but with Virtual Reality mode it will create an immersive Hololens application which will track your Hololens movements in space and move the main VR camera accordingly.
Also take this time to set the name of the project to Hollo World.
Firstly you want to adjust the main camera as this represents your Hololens. The important thing is to move it to 0,0,0 and change the skybox to be a solid colour that is all black (as black is transparent). The HoloLens recommended near clipping distance is 0.85 but I set mine to 0.05 so I can get really close to objects.
How easy was that? Now, lets add some content. I grabbed a simple 3d jet I have used before and through it in at 0,0,2 (2m in front of the camera). then I also created a UI Canvas and set it to world scale, shrunk it down so it just filled my screen (0.005 scale) and put a panel and a text box on it. I set the text to be “Hollo World” and positioned it also about 2m in front and above the jet.
That’s it ! Then I built it and it created me a Visual Studio project solution file.
Open up that Visual Studio solution (not the Unity one, but the one you just built) and it will open up in Visual Studio. Make sure your Hololens is plugged into USB. Now set the build type to RELEASE, the architecture to X86, and the device type to DEVICE.
Now Build -> Deploy Hollloword app and it will install onto the Hololens.
OK, awesome time: put on your Hololens and bloom geasture open the start menu, under the + (All apps) our Holloworld tile is now present. Click gesture to run the app and pin the Window App tile in your space. The app will auto load and we see our content. And the exciting this is we can now walk around and view it from any angle.
We have just built our first Hololens app !
App Lifecycle & World space tracking
Now, the first question I have how do applications work? do they stay running when we quit? Where is the Hololens camera origin? Now we’re going to look at those and other questions.
Firstly lets look at the core user interface to the operating system. Microsoft have a brand new platform and type of device here that is very different from desktop and mobile PC’s, but they have managed to not throw out the existing paradigms – in fact they have managed to retain the core concepts from the Windows Operating System within Hololens. Essentially Hololens in my opinion is the same as desktop Windows but moved into a 3d world space “desktop”. The mouse cursor is there, it’s just a gaze cursor that floats directly in front of you as a small dot. You move the cursor by simply moving your head. It’s not a very elegant solution – and very frustrating and tiring targeting with your head – but I see why they have done it – it’s a simpler learning curve and a type of experience that works across the board for migrating windows apps to Hololens. Now, they’re using a mouse cursor, so how do you click? You can use the seperate wireless clicker (but that would require you remember to bring it) so obviously they have gone with gesture based natural user interface (NUI). What you do is click with a finger gesture.
The Windows desktop has a start menu and app icons on the desktop and open windows. In Hololens, you have the start menu there (accessible via a cool bloom gesture), you have the app icons and windows present when you pin them to the space around you. The windows are not “live” though like on the desktop, each app window you pin will show a static image unless you choose to run the application.
Simpler to the mobile platforms, Hololens will basically only allow you to run one application at a time. But it is assuming you are jumping between multiple apps, so it will pause/resume applications when you switch out of them.
I’ve traced out the general flow of a Hololens application in the diagram below. The important thing is that you can follow this in Unity3d by listening to the OnApplicationFocus MonoBehaviour event:

World Space Tracking
Probably the first important and fundamental feature of the Hololens is that it does world-space tracking. That is from when your application launches and the user moves around their space, the location and orientation of the Hololens is being tracked and the Unity scene camera is updated. The tracking is suprisingly good – or maybe not suprisingly considering the number of cameras and IMUs in the device – but still, it worked way better then I expected.
From what I can tell, the camera location of the world while you are in the shell is completely ignored in your Unity application. When you look at the app tile and launch the application, it re-calculates your world origin. So for our content at 2m in front of the user in the Unity scene, when we launch the app, no matter where I am looking at the time the app launches, the content is correctly 2m in front of me. So that means, when you launch your app the world axis is set to be where you are looking (although Y axis follows gravity straight down). In my diagram above you can see the Hololens camera is starting at an origin point of 0,0,0.
Now, I already discovered that you could re-pin your application multiple times in your space. So what happens when you re-open your app from multiple locations? The result may surprise you…. in fact your application resumes (not restarts) and the content is back at where ever your originally launched your app from (even if it is way out of site a long distance away). Considering your app could be shut down at any time (eg: if the Hololens resets, or memory is low) then we can immediately see a problem with our little Holloworld app! The content could be not seen ! Oh no.
See in the diagram below:
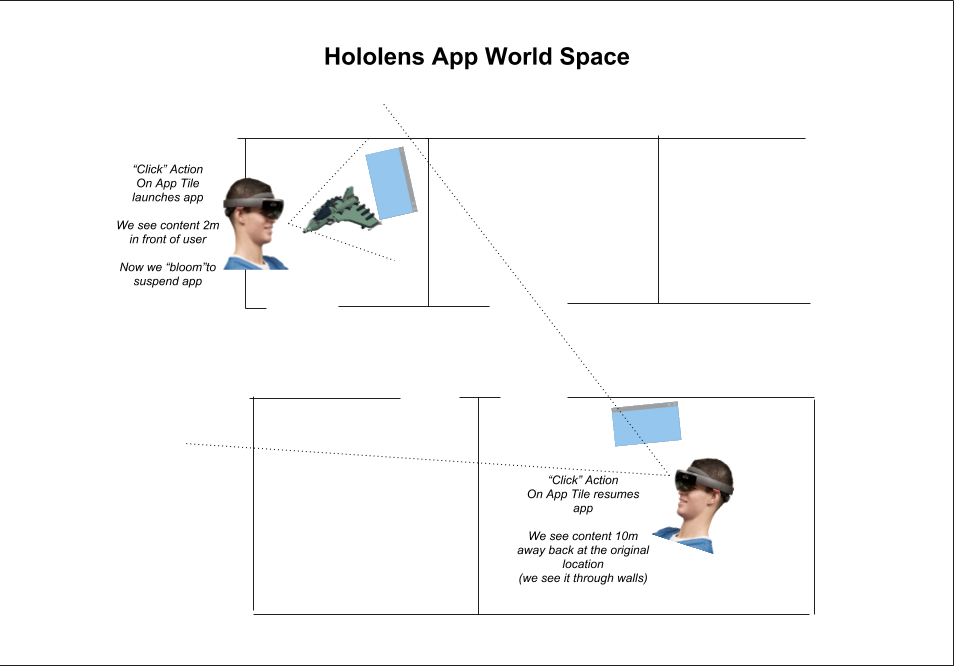
The solution is to detect when the app gets OnApplicationFocus(true) and re-position the content in front of the user. Great, that will work. But one technical issue I discovered that during the OnApplicationFocus event that camera position and orientation has not yet been updated, it takes at least a frame before it jumps to the correct place. So if you re-position your content in this way, you should wait at least one frame before using the camera transform.
Eg:
RepositionContent.cs
using System.Collections;
using System.Collections.Generic;
using UnityEngine;

public class RepositionContent : MonoBehaviour {

    public Transform Anchor;

    void OnApplicationFocus(bool focus) {
        if (focus) {
            StartCoroutine(RepositionContentCoroutine());
        }
    }

    IEnumerator RepositionContentCoroutine() {
        yield return new WaitForEndOfFrame();
        transform.position = Anchor.position;
    }
}
Now that we have added that to our app, the content wonderfully appears no matter which Pinned App tile we launch our app from.
Icons, Tiles and Splashes (oh my!)
I follow an agile software development methodology. That means in practise that after each piece of work (user story) I ship something. So I always need to be ready to ship. Usually in my first user story I prepare an “empry” app that is shippable – meaning it does nothing but it looks complete. The app needs a name and have the correct branding in icons, tiles and splashes on startup.
The same applies here with the contest, I know I have to ship an app, so this week I want to make sure I know how to prepare a build for shipping, and display the correct images on tiles and how to set the image on the pinned app window tile.
I was expecting this to be pretty straight forward and I wouldn’t need to write anything on this subject. But I actually found it quite overly complicated. Hololens is based on the Universal Windows Platform, and that started with a few logos (icons and tiles) and as the platform has evolved the number of icon variations has exploded. I think there is something like 60+ different images you can supply.
Add to this that Unity is generating your Visual Studio project, so Unity has it’s own idioms about what icons it generates and what size and scale they are. And you don’t want to miss some important icons, only to find out on some platforms the icon displays as Unity’s default icon, or a very poor resolution.
Looking at Hololens, there are currently 5 image types you need to think about:
- Square Store Icon
- Square App Logo (used on a tile and icon)
- Wide App Logo (used on a wide tile – not currently supported on Hololens but a requirment in case that changes)
- A Splash screen for pinned app window tile (used when you pin your app in space – but note the background colour is also needed)
- A Splash screen for when your app launches AKA Unity Splash screen
You’ll probably use the same icon image on the first 3. But you also need to supply the correct resolution. The Microsoft document is mostly using the 150% scale, but Unity wants to export the 200% scale – which makes sense because the current Visual Studio 2017 app packager is looking for those 200% scaled image assets. So for me, I used the 200% scale mostly and everything worked correctly.
Here is a list of image scales (and resolutions). In bold is the recommended size from Microsoft:
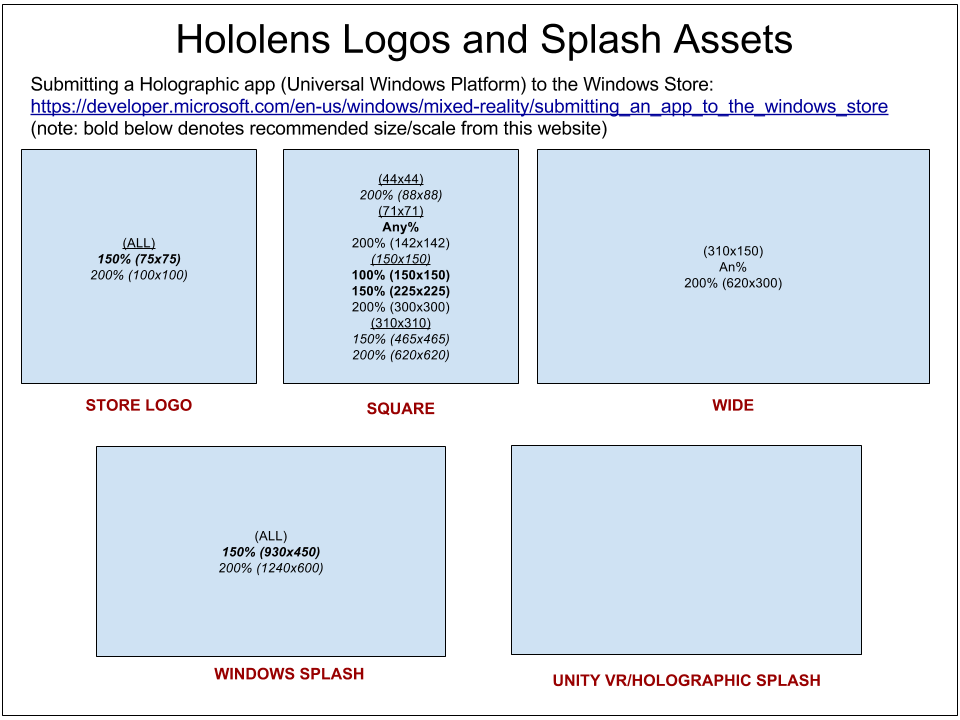
If you’ve watched by video above you’ve seen me setup the minimum set of icons that you need in Unity player settings to make sure you can build your application and submit it to the Windows Store. I’ve created the handy cheat sheet below so you can see which icons I have set.
Also for the splash you want to set the Windows Splash for the pinned app window. The VR & Holographic Splash image are only used on application launch (eg: instead of the Made with Unity splash):
![]()
If you provide the same images as above, not only will it work correctly visually in your Hololens, but you will be able to build your APX application package from Visual Studio.
Device Portal for HoloLens
As a developer (or an advanced user) of Hololens, one of the first questions I had was how can I get access to the photos and videos (without waiting for them to upload to One Drive), and also how do I get to diagnostics such as running processes, etc. I was pleased to find out that like other Windows devices the Hololens has support for Windows Device Portal.
The Device Portal for HoloLens is a running web server on your Hololens which you can connect to via any web browser on your PC (if plugged into USB browse to 127.0.0.1:10080) or local WiFi connected computer (you need the IP address of your Hololens and browse to it (no port necessary)).
You will need to turn it on, as it is off by default for security reasons. Just go to settings, Updates, Developer, and scroll down to find turning on the portal. It will prompt you to create a username and password the first time to setup a login account.
Specific instructions are available on the Device Portal for HoloLens page.
The portal has a lot of information, and one of the most useful pages is the Mixed Reality Capture where you can watch your Hololens video feed live and record it to a file:

Next Week
So thats it for this week. I think it was a very productive week – going from zero to being able to build a submittable Hololens app ! Wow.
Next week is all about learning about what technical features Hololens has and how we can access and use them from Unity3d.
See you then!
Leave a Reply