Today I’m going to break from the usual Oculus development articles, and walk through how to build your first Google cardboard app.
I’m assuming you’ve never looked into building a Cardboard app before, and you want to quickly cover the main features of a build.
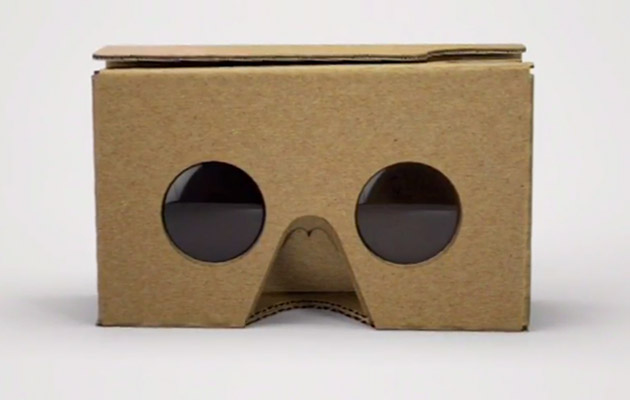
Google Cardboard V2 was introduced in May 2015 and It is much much easier to assemble (that is good news if you do want to actually make one). V2 also fits larger 6″ phones, and most importantly they added support for iOS (Google dropped the magnetic switch in favor of a capacitance button that works on all phones).
Google also upgraded the Cardboard Unity SDK to support V2 (as of version 0.5.0).
So, here is how you can build the exciting cube app below:
Setup
– Obtain a Google Cardboard V2 or (V1) headset for free or buy one from Google, or there is plenty of choice on eBay.
– Download Unity 5 (I’m using Unity 5.2.2 for this)
– Download the Cardboard SDK for Unity (I’m using v0.5.2 – just released today) in UnityPackage format.
Note: For faster project creation drag it into your C:\Program Files/Unity/Editor/Standard Assets folder.
– For Android: Download a JAVA Runtime and an Android SDK (Unity also provides you handy download buttons in the preferences dialog).
Create a project
– Open Unity, and create a new 3D project.
– Import the Cardboard SDK by Assets->Import Package->Custom Package, and select the CardboardSDK.unitypackage.
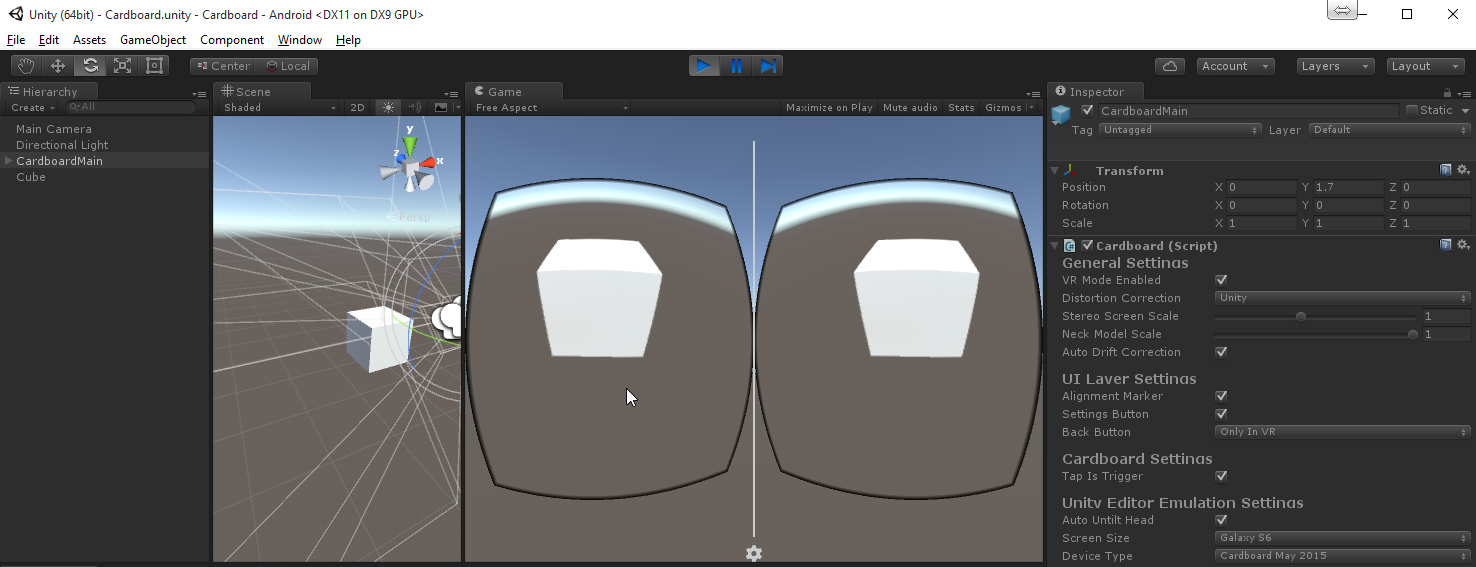
– Drag the CardboardMain prefab into the scene hierarchy (Assets/cardboard/prefabs/CardboardMain), and it’s position should be x:0,y:0,z:0. Set the y to 1.7 (so our virtual head is not on the ground).
– Select the CardboardMain game object, and in the inspector, under Unity Editor Emulation Settings, choose “Cardboard May 2015″.
– Delete the MainCamera as we won’t need that any more.
– Create a cube to look at: In the scene hierarchy right click then 3D Object -> Cube. Set it’s position to x:0,y:0.5,z:2.
Run in the editor
– Press PLAY, and you will see the well known split-screen stereoscopic distortion screens.
– To rotate your virtual head, hold ALT (Horizontal/Vertical) or CTRL (Tilt) and move your mouse
Run on an Android device
– Open File->Build Settings, select Android and switch platform
– Due to known rendering issues, in Build Settings, checkmark “Development build”.
– Open Player Settings, and under “Resolution and Presentation” set orientation to landscape left.
– Under “Other Settings” change the bundle id to be something unique (which can be anything, eg: com.tales.hellocardboard).
– Make sure your Android phone is plugged in via USB
– Hit Build & Run.
Quit with the back button
You probably noticed the back button (physical and on-screen) don’t do anything. That is because even though CameraMain fires an OnBack event, there is no code hooked up to listen for the event by default.
So, lets do that, and we’ll set the back button to close our app.
Select the CameraMain game object in the scene hierarchy, and in the inspector click Add Component -> New Script (c#) and name it CardboardQuit, add the following code:
CardboardQuit.cs:
using UnityEngine;
using System.Collections;

public class CardboardQuit : MonoBehaviour
{
    void Awake()
    {
        GetComponent<Cardboard>().OnBackButton += HandleOnBackButton;
    }

    void HandleOnBackButton ()
    {
        Application.Quit();
    }
}
Now, re-run the app and the back button will quit!
Gaze based input
Lets make it every time we look at the cube it will change color.
Firstly we add Gaze based input capability:
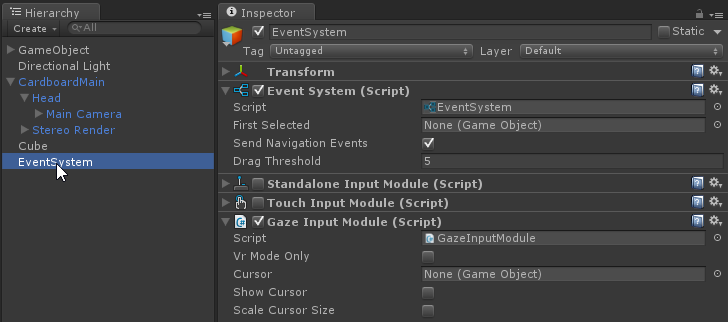
– Right click in the scene hierarchy and add UI -> Event System
– Drag the Assets/Cardboard/scripts/GazeInputModule onto the EventSystem game object.
– Disable (uncheckmark) or delete the existing StandaloneInputModule and TouchInputModule.
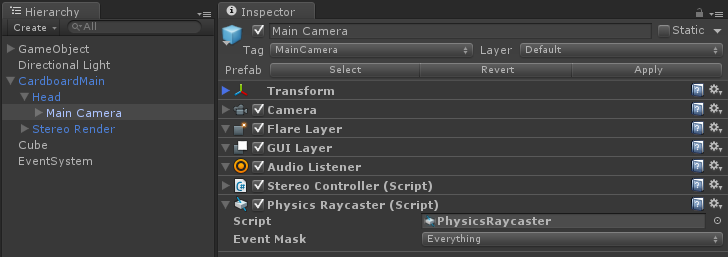
Next, we add a physics raycaster to our CardboardMain camera so that we can detect hits against 3D objects with colliders (such as our cube).
– Select the game object CardboardMain/Head/Main Camera and in the inspector click Add Component -> Physics Raycaster
Now, finally lets have our cube change color:
– In the Project explorer, right click and Create -> Material, then drag it onto our Cube game object (We need this material so we can modify it’s color at runtime – we can’t modify the default material the is on the Cube).
– Select the game object Cube in the scene hierarchy, then in the inspector Add Component -> Script (C#) and name it Cameleon:
Cameleon.cs:
using UnityEngine;
using UnityEngine.EventSystems;

public class Cameleon : MonoBehaviour, IPointerEnterHandler
{
    public void OnPointerEnter(PointerEventData eventData)
    {
        GetComponent<Renderer>().material.color = new Color (Random.value, Random.value, Random.value, 1.0f);
    }
}
Now, re-run the app and every time you look at the cube it will change color!
… and click!
With Gaze Based Input now setup, we can also receive click events, modify the script above to add a click handler and change the color to black when clicking whilst looking at the cube:
Cameleon.cs:
using UnityEngine;
using UnityEngine.EventSystems;

public class Cameleon : MonoBehaviour, IPointerEnterHandler, IPointerClickHandler
{
    public void OnPointerEnter(PointerEventData eventData)
    {
        GetComponent<Renderer>().material.color = new Color (Random.value, Random.value, Random.value, 1.0f);
    }

    public void OnPointerClick(PointerEventData eventData)
    {
        GetComponent<Renderer>().material.color = new Color (0, 0, 0, 1.0f);
    }
}
Now, re-run the app and if you click while looking at the cube it will go dark.
That’s it! Congratulations, you’ve built your first Google Cardboard app. I hope this article helped!
March 18, 2016 at 4:08 am
Awesome!! Thanks for the post. This is really going to help me make my first google cardboard app.
April 14, 2016 at 12:15 am
One question I have is, if I build with this on Unity, and I want to play my unity game on my windows 8.1 tablet which is x86. Will the stereoscopy and other cardboard stuff work on my tablet? I am intending to turn the tablet into a cardboard device possibly, thanks.