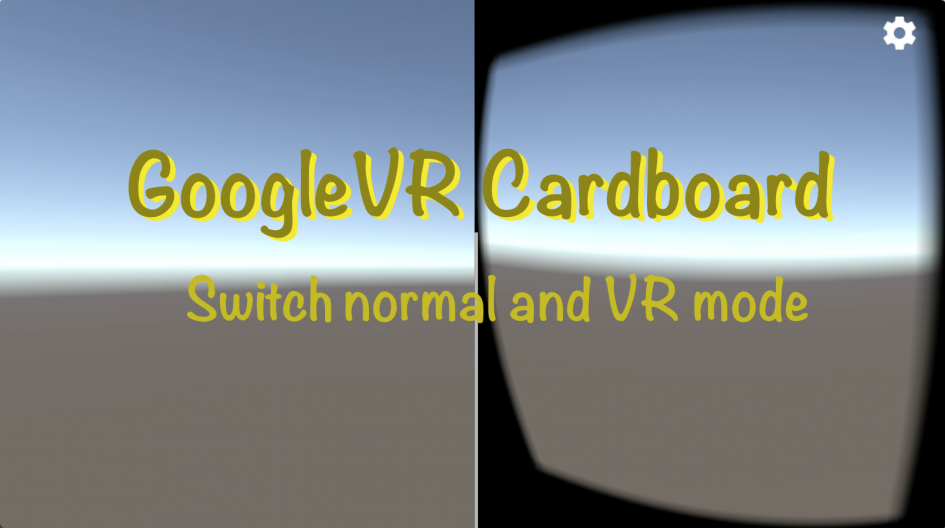
One of the cool features of GoogleVR Cardboard apps is that you can switch from normal mode to VR mode as necessary letting your app bridge the best of both mobile and VR. It can definitely lesson the development burden also having a part that is traditional mobile development and only developing for VR the parts you want in VR.
Today I’m going to show you how to do this with Unity3d 5.6 which has cardboard integrated natively in it.
Watch it here:
In the past with the GoogleVR Cardboard SDK you would use the GvrViewer component and toggle VRModeEnabled like this:
GvrViewer.Instance.VRModeEnabled = true|false;
But in the current GoogleVR SDK 1.6 the GvrViewer is no longer provided as standard. But that’s ok, because Unity now has a generic way to switch between VR modes – which is great because you may also have additional VR devices to support in the future.
You can now load VR profiles via the Unity3d VRSettings API:
public static void LoadDeviceByName(string deviceName);
and you can see the current loaded device via:
public static string loadedDeviceName;
Special note: If you set the loaded device to be “None” then the loadedDeviceName property actually returns “” ( an empty string).
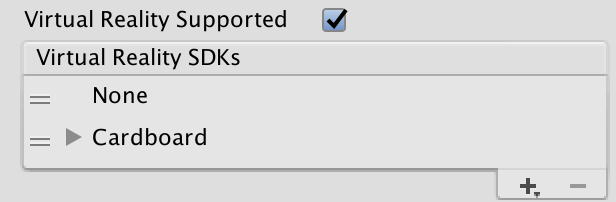
To use this, in your project player settings you want to enable VR mode, and add the desired SDK (“cardboard”) but importantly also add the (“None”) SDK which allows you to switch out of VR mode altogether:
Here is a simple script to switch between normal and cardboard VR mode when you tap the screen:
VRToggle.cs:
using System.Collections;
using UnityEngine;
using UnityEngine.VR;

public class VRToggle : MonoBehaviour
{

    void Update() {

        if (Input.GetMouseButtonDown (0)) {
            ToggleVR ();
        }
    }

    void ToggleVR() {

        if (VRSettings.loadedDeviceName == "cardboard") {
            StartCoroutine(LoadDevice("None"));
        } else {
            StartCoroutine(LoadDevice("cardboard"));
        }
    }

    IEnumerator LoadDevice(string newDevice)
    {
        VRSettings.LoadDeviceByName(newDevice);
        yield return null;
        VRSettings.enabled = true;
    }
}
Please watch the video for a complete step-by-step tutorial.
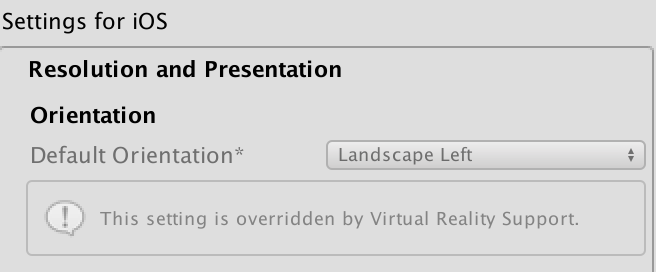
IMPORTANT UPDATE: SCREEN ORIENTATION FOR VR “NONE”
When you select “Virtual Reality Supported” in project settings, it disables your ability to set the orientation. By default this is Automatic auto-rotation – but most likely you don’t want that at all – you will get weird effects (and bugs) if you rotate between landscape/portrait.
So, orientation although disabled – does actually behave normally when your VR mode is “None” – so you need temporarily disable “Virtual Reality Supported” checkbox (you won’t lose your settings), go to presentation and choose which orientations you want, then come back and re-enabled the “Virtual Reality Supported” option.
For me, here I set Landscape Left only, and with Virtual Reality Supported it looks like this:
November 9, 2017 at 12:11 am
Hey, in the old version of the Google VR SDK, when we disabled the viewer, it still rotated and moved with the phone like it was in VR mode. This stopped with the most recent version, Do you know why?